玩转sriov-network-device-plugin
sriov-network-device-plugin需基于multus/danm和srioc-cni,所以我们依次安装multus、sriov-cni、sriov-network-device-plugin。
1. 安装Multus
Multus项目地址:[https://github.com/intel/multus-cni.git](https://github.com/intel/multus-cni.git
cd multus-cni-master
kubectl create -f file://C:/Users/liyang07/Documents/Gridea/post-images/multus-daemonset.yml
部署完成后:
- 每个node上都会运行一个multus的守护进程;
- 获取当前“主cni”配置,并创建一个新的multus cni配置/etc/cni/net.d/00-multus.conf,以劫持cni
配置入口:
- 创建/etc/cni/net.d/multus.d,用来存储multus访问API server的验证文件;
验证安装是否成功:
# kubectl get pods --all-namespaces | grep -i multus
kube-system   kube-multus-ds-amd64-4ncw6                     1/1     Running   0          17h
kube-system   kube-multus-ds-amd64-jgzp4                     1/1     Running   2          24h
OK,让我们用macvlan口来验证一下Multus是否可以正常工作。
apiVersion: "k8s.cni.cncf.io/v1"
kind: NetworkAttachmentDefinition
metadata:
  name: macvlan-conf
spec:
  config: '{
      "cniVersion": "0.3.0",
      "type": "macvlan",
      "master": "bond2.100",
      "mode": "bridge",
      "ipam": {
        "type": "host-local",
        "subnet": "192.168.1.0/24",
        "rangeStart": "192.168.1.200",
        "rangeEnd": "192.168.1.216",
        "routes": [
          { "dst": "0.0.0.0/0" }
        ],
        "gateway": "192.168.1.1"
      }
    }'
Multus在部署的时候,顺便创建了一个CRD,用来让用户定义想要添加什么样的“副CNI”。上面的配置定义了我们想要给指定的pod添加基于macvlan的网口。下面让我来创建一个需要添加macvlan接口的pod:
apiVersion: v1
kind: Pod
metadata:
  name: samplepod
  annotations:
    k8s.v1.cni.cncf.io/networks: macvlan-conf
spec:
  containers:
  - name: samplepod
    command: ["/bin/ash", "-c", "trap : TERM INT; sleep infinity & wait"]
    image: alpine
注意:
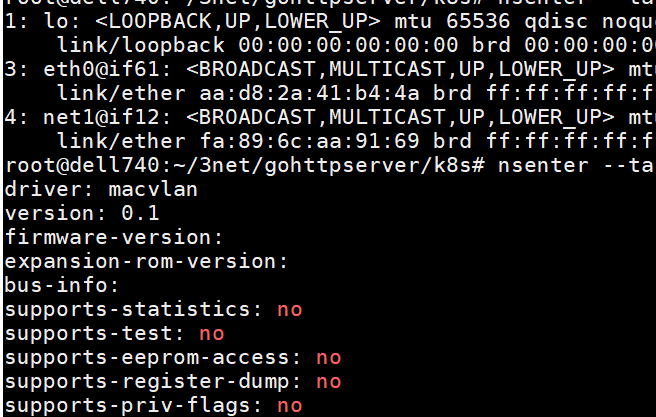
并不是所有的pod创建都会自动添加副接口,我们需要通过annotations指定,我们想要给pod添加“哪些”副接口。pod成功Running后,我们查看pod里面的网卡配置,可以看到名为net1的我们创建的macvlan接口:
OK,如果我们想要添加更多的“副接口”呢,配置如下:
apiVersion: v1
kind: Pod
metadata:
  name: samplepod
  annotations:
    k8s.v1.cni.cncf.io/networks: macvlan-conf, sriov-net1 # 新增sriov-net1类型的接口
spec:
  containers:
  - name: samplepod
    command: ["/bin/ash", "-c", "trap : TERM INT; sleep infinity & wait"]
    image: alpine
    resources: # 这是sriov接口特有的配置,这里先忽略
      requests:
        intel.com/mlnx_sriov: '1'
      limits:
        intel.com/mlnx_sriov: '1'
应用后,我们可以分别看到名为net1的vxlan接口和名为net2的sriov接口:
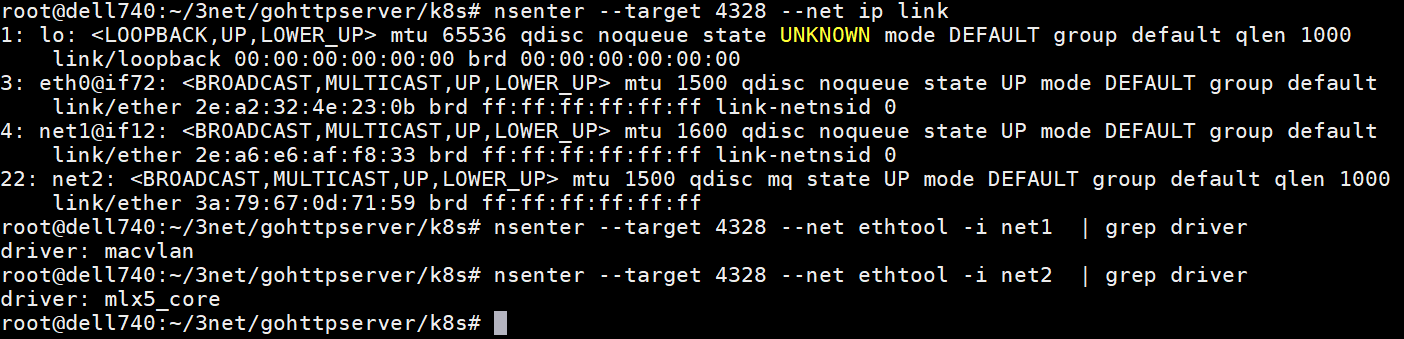
说明:上述配置是我在以完成sriov-network-device-plugin安装的情况下才可以配置sriov接口。
2. 安装sriov-cni
项目地址:https://github.com/k8snetworkplumbingwg/sriov-cni.git
没有太多好讲的,把二进制编译出来放到/opt/cni/bin/目录下即可:
# git clone https://github.com/k8snetworkplumbingwg/sriov-cni.git
# cd sriov-cni
# make
# cp build/sriov /opt/cni/bin
一般cni的安装需要cni二进制(/opt/cni/bin/)+cni配置文件(/etc/cni/net.d/),因为这里所有的cni配置已经被multus劫持,所以只需要安装二进制文件即可,而具体的每个副cni配置则通过multus的CRD NetworkAttachmentDefinition来定义。
3. 安装sriov-network-device-plugin
项目地址:https://github.com/k8snetworkplumbingwg/sriov-network-device-plugin.git
# git clone https://github.com/k8snetworkplumbingwg/sriov-network-device-plugin.git
# cd sriov-network-device-plugin/
这里需要编辑下configmap文件,这个configmap使用来定义sriov资源的,我用的mellanox网卡,配置如下:

参数解析:
- vendors通过lspci -v -s pci_addr可以查看;
- devices,我的网卡pf时1017,vf是1018,包括驱动,dpdk-devbind.py都可以查看。
开始部署:
# kubectl create -f configMap.yaml
# kubectl create -f k8s-v1.16/sriovdp-daemonset.yaml
# kubectl get pod --all-namespaces | grep sriov
kube-system   kube-sriov-device-plugin-amd64-5vsnr           1/1     Running   0          18h
kube-system   kube-sriov-device-plugin-amd64-lr8wh           1/1     Running   0          19h
sriov-device-plugin成功部署,我们可以看到vf被添加到相应的资源池:
# kubectl get node dell740.it.163.org -o json | jq '.status.allocatable'
{
  "cpu": "48",
  "ephemeral-storage": "260988928388",
  "hugepages-1Gi": "0",
  "hugepages-2Mi": "0",
  "intel.com/intel_sriov_dpdk": "0",
  "intel.com/intel_sriov_netdevice": "0",
  "intel.com/mlnx_sriov": "24",
  "memory": "394747480Ki",
  "pods": "110"
}
OK,sriov-device-plugin到现在算是部署成功了,接下来我们可以创建基于sriov的“副CNI”了:
apiVersion: "k8s.cni.cncf.io/v1"
kind: NetworkAttachmentDefinition
metadata:
  name: sriov-net1
  annotations:
    k8s.v1.cni.cncf.io/resourceName: intel.com/mlnx_sriov
spec:
  config: '{
  "type": "sriov",
  "cniVersion": "0.3.1",
  "name": "sriov-network",
  "ipam": {
    "type": "host-local",
    "subnet": "172.10.1.0/24",
    "routes": [{
      "dst": "0.0.0.0/0"
    }]
  }
}'
注意:annotations里指定的resourceName,必须跟前面configmap定义的资源名称“完全一致”。
OK,创建基于sriov的pod的配置前面已经贴过了。置于configmap以及pod yaml中的配置参数,可以参考项目中的文档。