使用kubebuilder创建CRD及Controller
1. 安装kubebuilder
建议源码安装更容易些:
git clone https://github.com/kubernetes-sigs/kubebuilder.git
cd kubebuilder/
make install
./bin/kubebuilder version
将./bin/kubebuilde拷贝到可执行路径
2. 使用kubebuilder创建CRD及Controller
官方参考文档:
https://book-v1.book.kubebuilder.io/quick_start.html
其他参考文档:
https://www.cnblogs.com/alisystemsoftware/p/11580202.html
https://blog.csdn.net/qianggezhishen/article/details/106995181
2.1 准备工作
mkdir -p testProject/src/testController
cd testProject/
export PATH=$PATH:/root/go/bin/
export GOPATH=$PWD
# 强制启用go module
export GO111MODULE=on
# 配置默认从goproxy.io拉去go mod的依赖包,goproxy.io是国内七牛云维护的一个golang包代理库
export GOPROXY=https://goproxy.io
cd src/testController
2.2 创建PROJECT
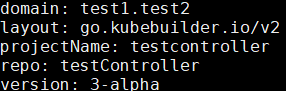
kubebuilder init --domain test1.test2 --license apache2 --owner "The Kubernetes Authors"
cat PROJECT
2.3 创建API
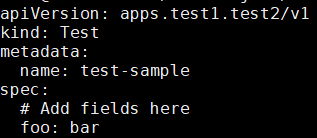
kubebuilder create api --group apps --version v1 --kind Test
cat config/samples/apps_v1_test.yaml
2.4 Install the CRDs into the cluster
make install
2.5 在本地运行Controller
make run

2.6 创建Resource of CRD
kubectl create -f config/samples/apps_v1_test.yaml
可以看到controller的日志打印如下

2.7 编译打包
首先修改Dockerfile:
1)在RUN go mod download前插入一行ENV GOPROXY=https://goproxy.cn,direct
2)将FROM gcr.io/distroless/static:nonroot改为FROM golang:1.13
3)删除USER nonroot:nonroot
然后运行:
docker build -t test-controller .
成功会看到

可以通过docker images命令查看镜像,或者通过docker save和docker load导出和导入。
3. 创建Core Resource的controller
参考:
https://book-v1.book.kubebuilder.io/beyond_basics/controllers_for_core_resources.html
-
创建后需要修改controllers/deployment_controller.go文件:
import添加:corev1 "[k8s.io/api/core/v1](http://k8s.io/api/core/v1)" import删除:appsv1 "testController/api/v1" -
修改函数SetupWithManager:
将For(&appsv1.Test{})改为For(&corev1.Pod{})

然后重新make run,则会收到pod创建、删除的event消息